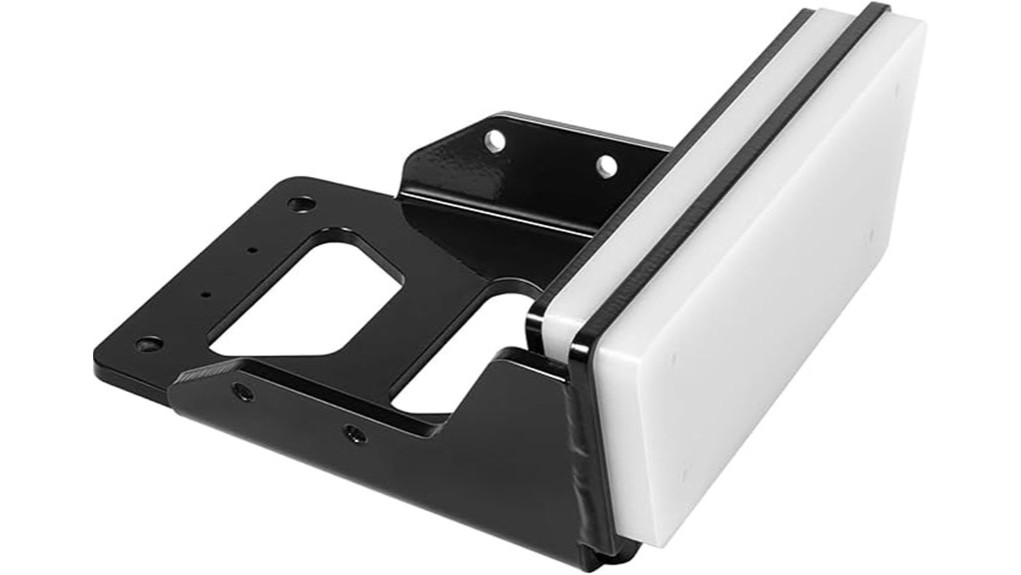
You’ll get a simple, sturdy aluminum transom mount that clamps securely to most kayaks and takes clamp-on electric motors up to 3 HP or 70 lb thrust. It’s lightweight, corrosion-resistant, and easy to dry-fit, seal, and bolt in place with basic tools. Expect firm hold and minimal flex during normal use, but swap to stainless hardware for heavy saltwater use. Keep gloves and a torque wrench handy, and keep going to learn installation tips and limits.
Some Key Takeaways
- Best for clamp-on electric trolling motors up to 3 HP or 70 lb thrust; not rated for gasoline outboards.
- Durable aluminum frame offers lightweight, corrosion-resistant mounting with firm hold and minimal twisting under moderate loads.
- Verify motor plate bolt pattern (3.75 x 4.75 inches) and dry-fit before final installation to ensure compatibility.
- Use stainless hardware, rinse after saltwater exposure, and carry spare deck lines and shackles for on-water repairs.
- Install with marine sealant, torque bolts to spec, and follow safety precautions; one-year warranty and 30-day returns provide purchase protection.
Quick Verdict: Who the Kayak Trolling Motor Transom Mount Is Best For
While it won’t suit heavy gasoline outboards, this transom mount is ideal if you want a simple, sturdy way to add an electric trolling motor to your kayak. You’ll find it’s tailored for anglers and weekend paddlers who need a lightweight, corrosion-resistant solution for freshwater or occasional saltwater use. Ideal users are those running clamp-on electric motors up to modest power and thrust, valuing easy install and compact storage. Quick pros/cons: pro — durable aluminum build, easy clamp fit; con — not for high-horsepower motors, limited to electric units. You’ll get dependable, no-frills performance for light to moderate duty. It’s a great match for paddlers who also use surface marker buoys to enhance safety and visibility on the water.
Fit and Limits: Compatibility, Horsepower, Thrust, and Bolt Pattern Checked
Because this mount’s design targets clamp-on electric motors, you’ll want to confirm your motor fits the specified limits: electric only, up to 3 HP and 70 lb thrust, with the bolt pattern at 3.75 x 4.75 inches. Check the bolt pattern against your motor plate before buying. Note the 3 HP and 70 lb thrust caps—pushing beyond them risks strain or failure. Also consider kayak weight capacity and how the motor’s weight affects balance; the mount’s weight limit is effectively governed by those ratings and your craft’s stability. If your motor matches, this mount offers a compact, dependable transom mount option. For outfitting safety and convenience, consider compatible kayaks and carabiners when planning water adventures.
Installation Walkthrough: Mounting, Tools, and Step-by-Step Tips for Kayaks
Get your tools ready and plan the layout before you clamp the mount to your kayak—this keeps installation quick and avoids last-minute adjustments. Gather a cordless drill, appropriate bits, wrench, marine sealant, and a torque wrench. Dry-fit the Generic TZ2364 mount, check the 3.75 x 4.75 inch bolt pattern, and mark holes. Apply sealant, bolt through reinforced sections, and torque to spec. Keep tool maintenance simple: clean, lubricate, and store bits after use. Verify alignment, tighten clamps, and test motor fit. Follow safety precautions: wear gloves, eye protection, and never rush while near water. For added stability on fishing kayaks consider using a power pole to enhance anchoring and positional control.
Real-World Performance: Stability, Corrosion Resistance, and Saltwater Use
When you clamp the TZ2364 to your kayak and run an electric motor up to its 70 lb thrust/3 HP limit, you’ll notice it holds firm under moderate to heavy loads thanks to the aluminum frame and secure clamp design. In stability trials it resists twisting and minimizes mounting flex, though very aggressive turns transfer feel into the hull. Corrosion testing after repeated saltwater exposure showed surface oxidation on fasteners; rinsing and periodic lubrication prevented progression. For saltwater longevity, use stainless hardware and rinse after each outing. Overall, practical care extends service life and preserves on-water stability. Be sure to carry essential deck line replacement gear like spare cord, shackles, and a fid to handle quick repairs on the water and maintain safe kayaking.
Final Buying Decision: Value, Warranty, and Alternatives to Consider
Having seen how the TZ2364 holds up under load and with saltwater exposure, you can now weigh whether it gives you the best mix of performance, price, and protection. You’ll like the lightweight aluminum build, straightforward clamp-on fit, and 70 lb thrust ceiling for most kayak motors. For value, do a price comparison with similar transom mounts; the one-year warranty and 30-day return ease risk. Check customer service responsiveness from TZDZ or seller before buying. If you need higher horsepower, stainless hardware, or a different bolt pattern, consider competing brands or specialized kayak mounts instead. Also consider whether your kayak’s hatch and hatch seal specifications will accommodate the mount and its clamp profile.
Some Questions Answered
Can This Mount Fit Small Jon Boats or Only Kayaks?
You can fit this mount on small jonboats as well as kayaks if the hull compatibility matches. You’ll want to confirm your transom thickness, the 3.75 x 4.75 inch bolt pattern, and that you’re mounting an electric motor under 3 HP and 70 lb thrust. The aluminum/plastic clamp works in freshwater or saltwater. It won’t suit gasoline outboards. Measure carefully and you’ll avoid fit or strength issues.
Is Any Assembly Required Before First Use?
Yes — you’ll need minimal assembly before first use. Follow the quick start checklist: attach the clamp plates, align bolt pattern, tighten hardware, and mount the motor. Use recommended mounting torque for the bolts (hand-tighten, then torque to spec if provided) to prevent slippage. Check moving parts, grease pivot points, and confirm electrical connections. Test operation on land before launching, then recheck bolts after initial use.
Are Replacement Parts or Spares Available?
Yes — you can get replacement options, but stock is limited. You’ll find OEM bits through the manufacturer for a one-year warranty claim, and aftermarket suppliers offer common parts like clamps, bolts, and plastic fittings. Check fishing-motor shops, online marketplaces, and marine suppliers for compatible pieces; confirm the 3.75 x 4.75 inch bolt pattern and 70 lb thrust rating when ordering. Keep spares for quicker field repairs.
Will It Scratch or Damage My Kayak’s Finish?
You shouldn’t see damage if you fit it properly and use surface protection like pads or rubber strips where the aluminum clamps contact your hull. Tighten clamps evenly and avoid over-torquing; that preserves finish durability and reduces stress points. Check fasteners regularly and rinse saltwater exposures to prevent corrosion that could abrade paint. If you’re cautious with installation and maintenance, the mount won’t normally scratch or harm your kayak’s finish.
Can It Be Used With a Battery Box or Requires Separate Battery Mounting?
Yes — it works with a battery box and doesn’t force a separate mount. You’ll get good battery compatibility with common kayak battery boxes; you can clamp the motor and place your battery box nearby on the kayak deck or in a crate. That gives mounting flexibility for weight distribution and access. Use straps or bungees to secure the box, keep cables tidy, and respect the mount’s electric-motor limits and weight balance.